
You can use the Preview window to examine a single or set of photos. You can use the Preview window in combination with keyboard shortcuts to quickly cull and rate photos. In addition, the Preview window displays a concentration of metadata and other information about the photo.
The Preview window appears when you press the spacebar in a contact sheet, select the magnifying glass button at the bottom right corner while hovering the mouse cursor over a thumbnail in a contact sheet, or with at least one thumbnail selected, use the keyboard shortcut of command-R on macOS or Control-R on Windows.
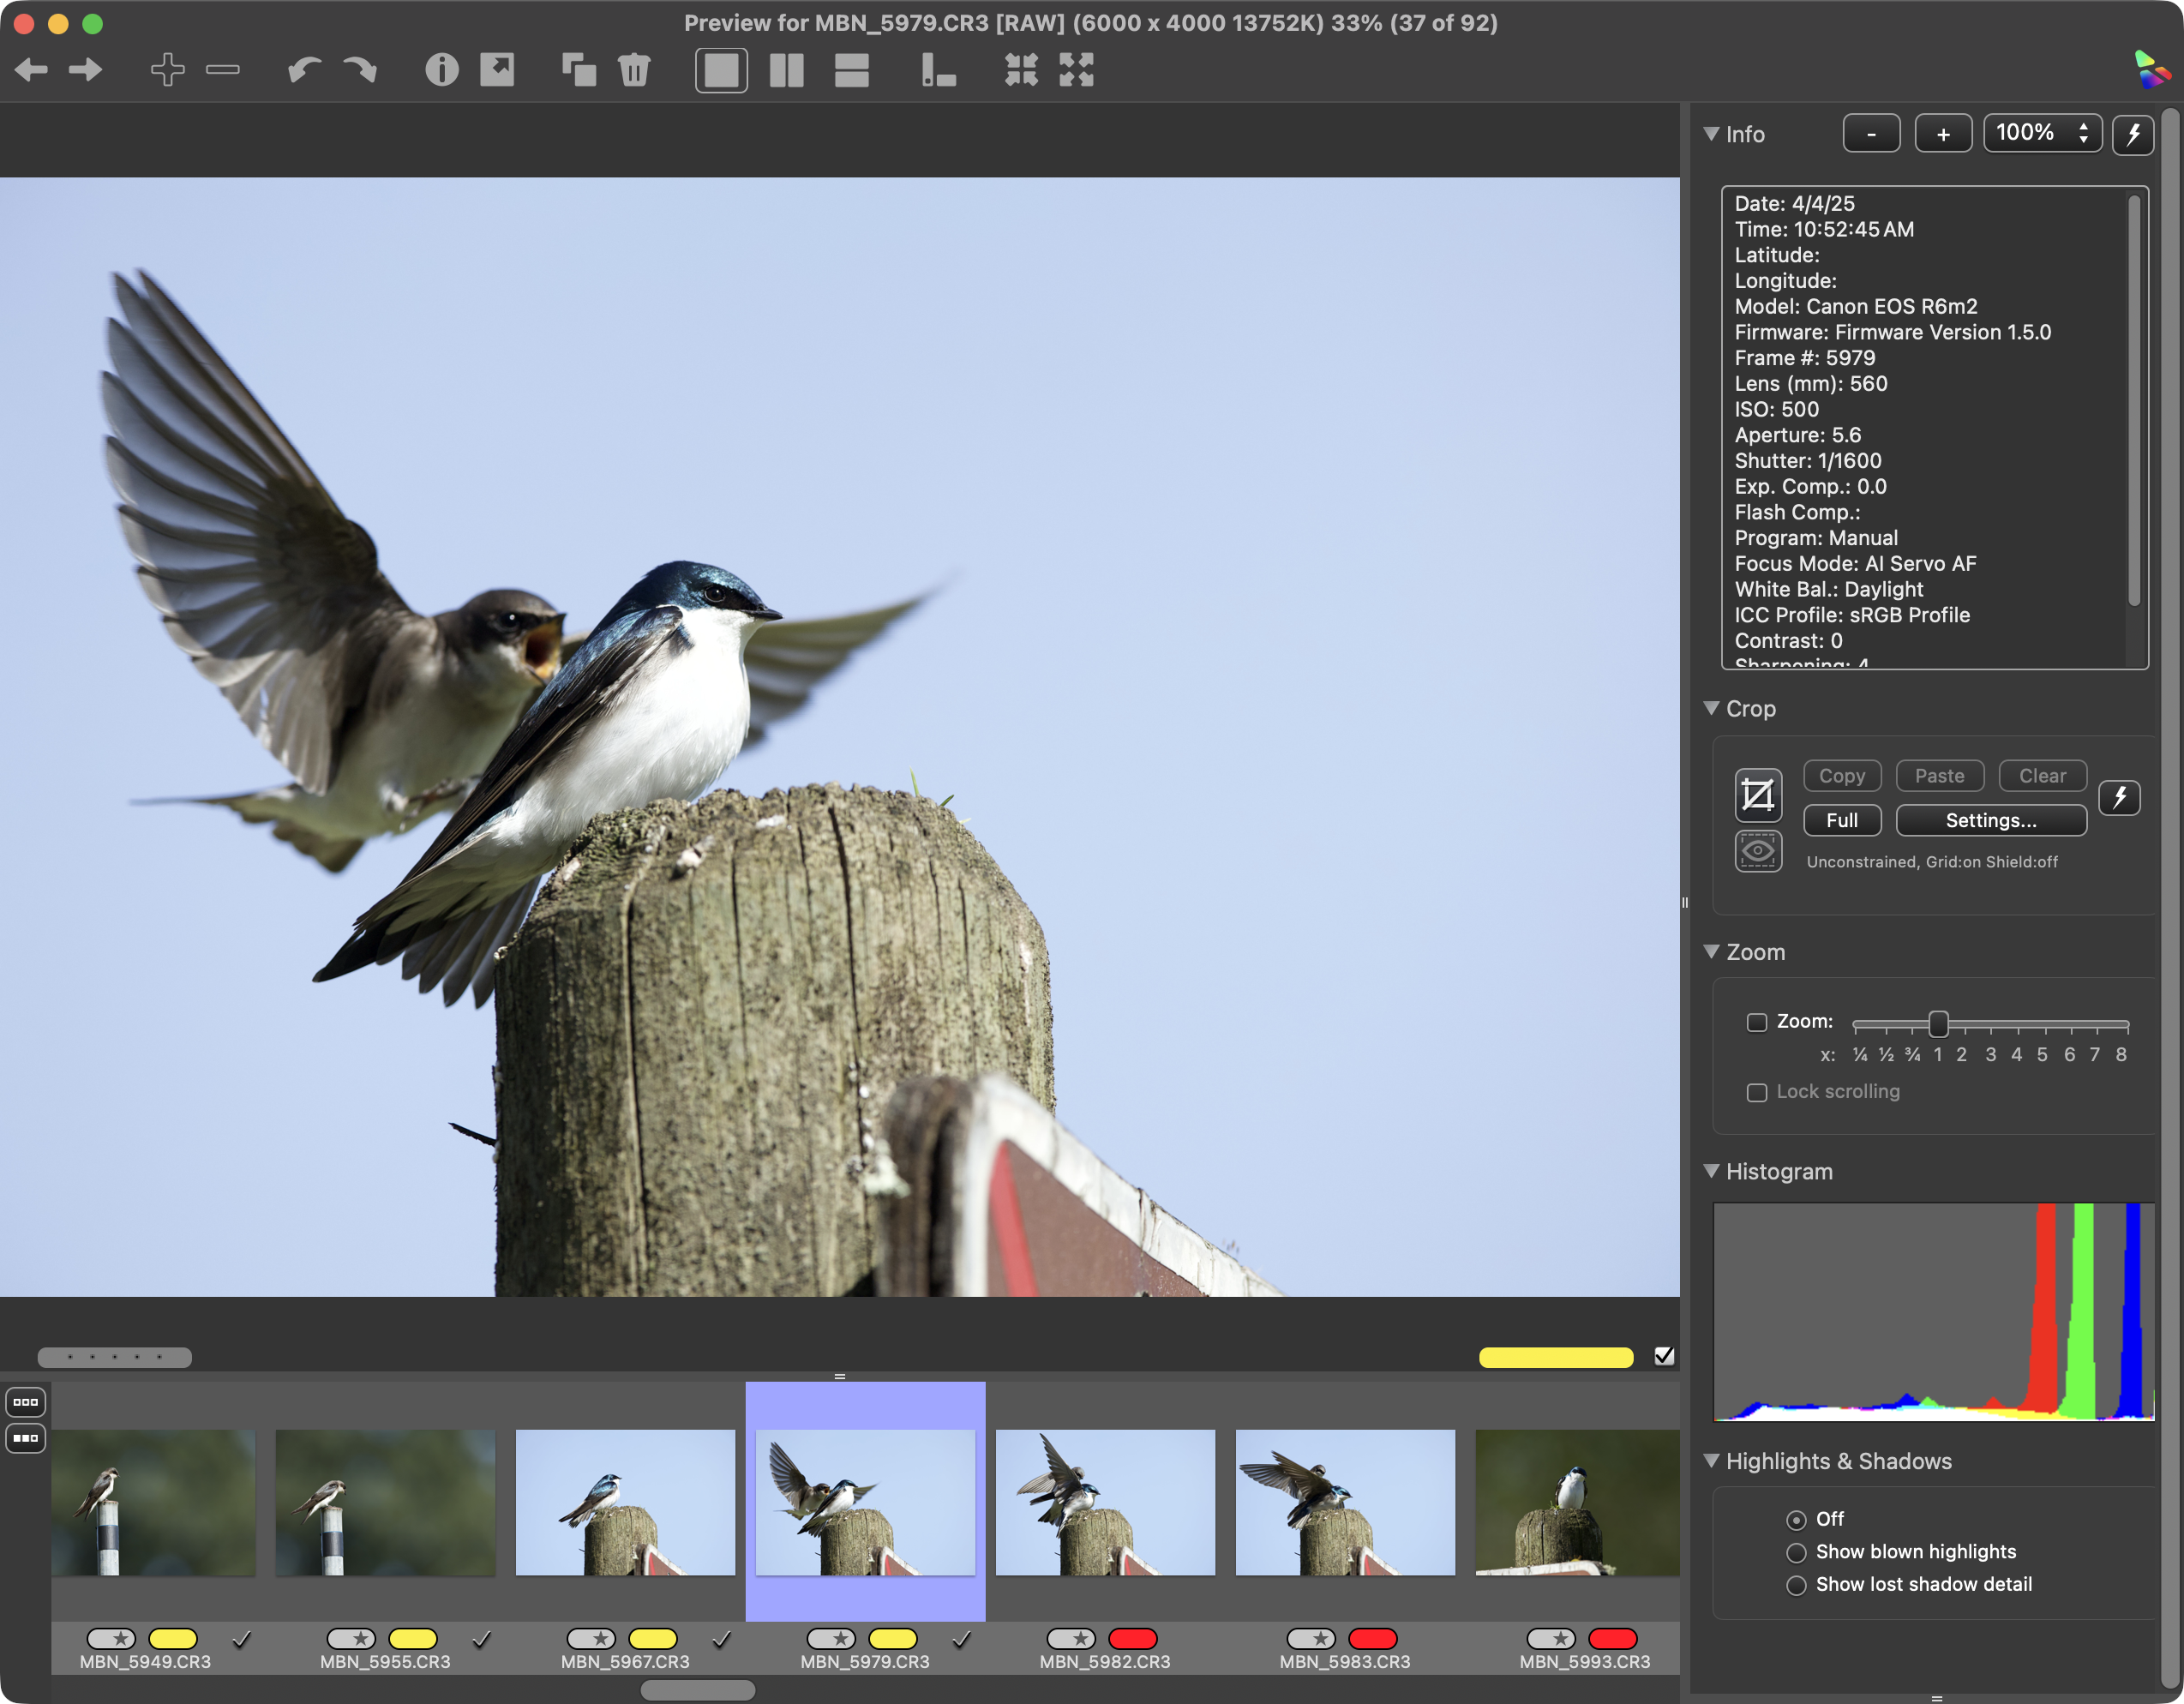
By default, the Preview window displays two panes: The thumbnail strip and the Info pane. Both are resizable by selecting and dragging the handles at the center edge of each pane.
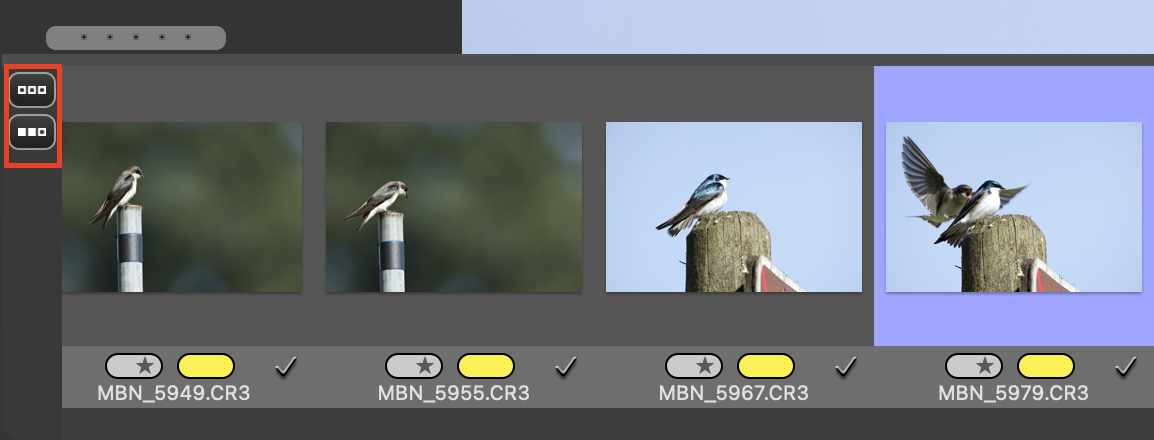
The thumbnail strip shows the photos adjacent to the preview photo. Use the buttons seen in the following screenshot to display all photos in the contact sheet (the top button) or only show the photo or photos you currently have selected in the contact sheet (the bottom button).
The Info Pane
The Info Pane, by default, will be on the right side of the Preview window. The Info Pane consists collapsible panels that provide information about your images, as well as some helpful tools for reviewing your images. Select the triangle icon next to the title of each panel to reveal or hide its information or tools.
- Info
- The Info Panel displays information about the image that is currently shown in the main area of the Preview window. Below is an example of the default information shown in the Info Panel:

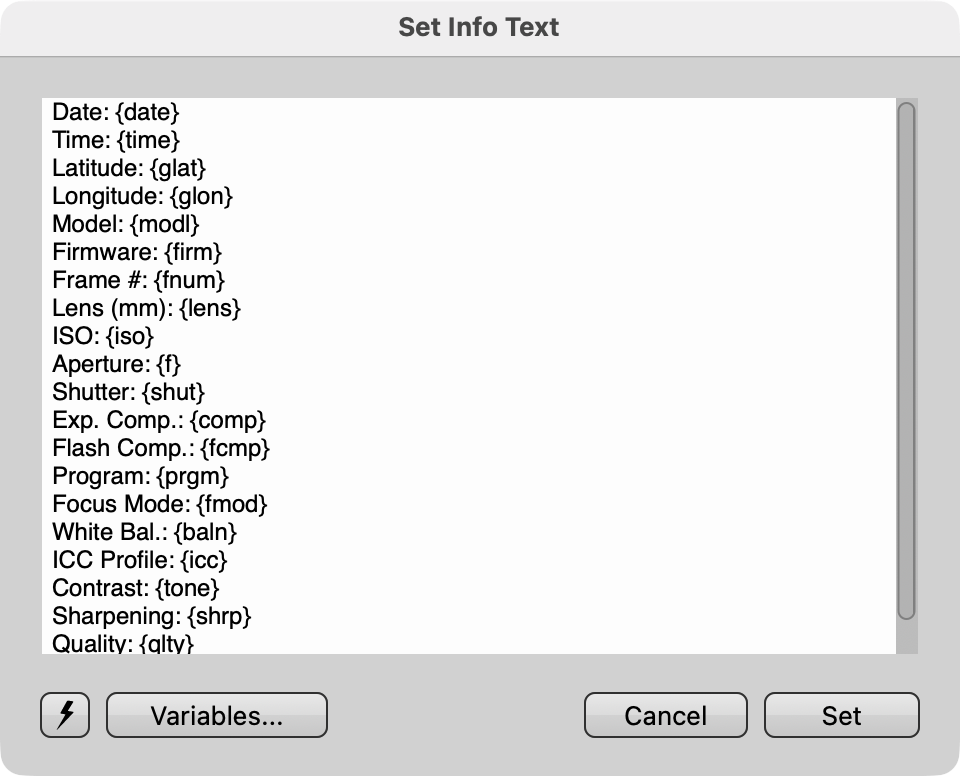
- This list is completely customizable. To customize what information appears in the Info panel, select the Edit menu from the top menu bar, hover the cursor over Settings, then select Set Info Text...from the sub-menu.
- The contents of the Set Info Text window will mirror what you see in the Info panel. You can edit the text like you would in any text editing program. In place of the metadata from the image, you will see the Variables that tell Photo Mechanic which metadata you want to display. You can use any valid variables.
- You can control the height of the Preview Window's Info panel and scale its text
- Select the + button to make the panel taller, or the - button to shrink it
- Select the dropdown menu displaying the percentage to choose how to scale the text
- If you would like to quickly switch between sets of metadata shown in the Info panel, create a Snapshot in the Edit>Settings>Set Info Text window and it will then be a selectable option in the Snapshot menu above the Info Panel.
- The Info Panel displays information about the image that is currently shown in the main area of the Preview window. Below is an example of the default information shown in the Info Panel:
- Crop
- Zoom
Histogram
Highlights & Shadows

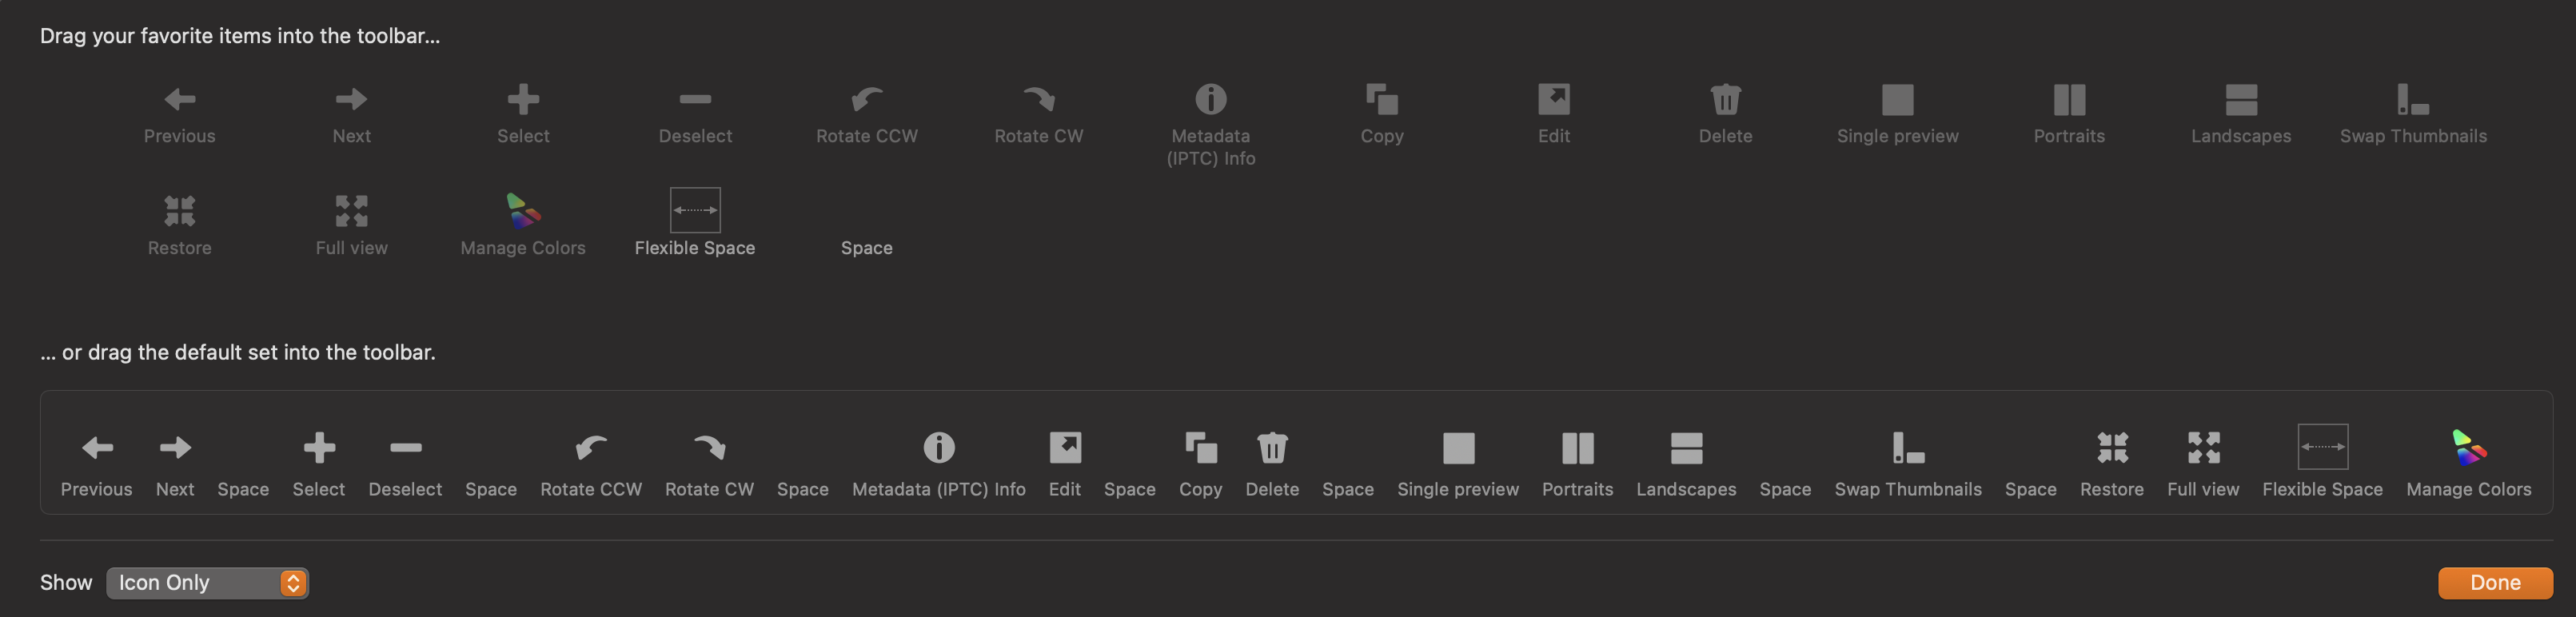
The Preview window's top toolbar buttons allow you to: navigate to the previous and next photo in the thumbnail strip, remove or add photos from a selected set, rotate photos, open the Metadata (IPTC) Information tool, open the photo in an external editor, copy photos, delete the photo, view single or 2-Up images, change the thumbnail strip orientation (vertical or horizontal), and hide or restore the panes, and toggle color management on and off.

Hover the mouse cursor over a button to find out what it does. You can also use keyboard shortcuts for all of these actions.
Photo Mechanic users on macOS can customize the toolbar by right clicking or control-clicking empty space in the toolbar, then selecting "Customize Toolbar". The same menu also has options to show Icons only or Icons and Text in the toolbar.